Showing posts with label Food. Show all posts

Tuesday, June 4, 2013

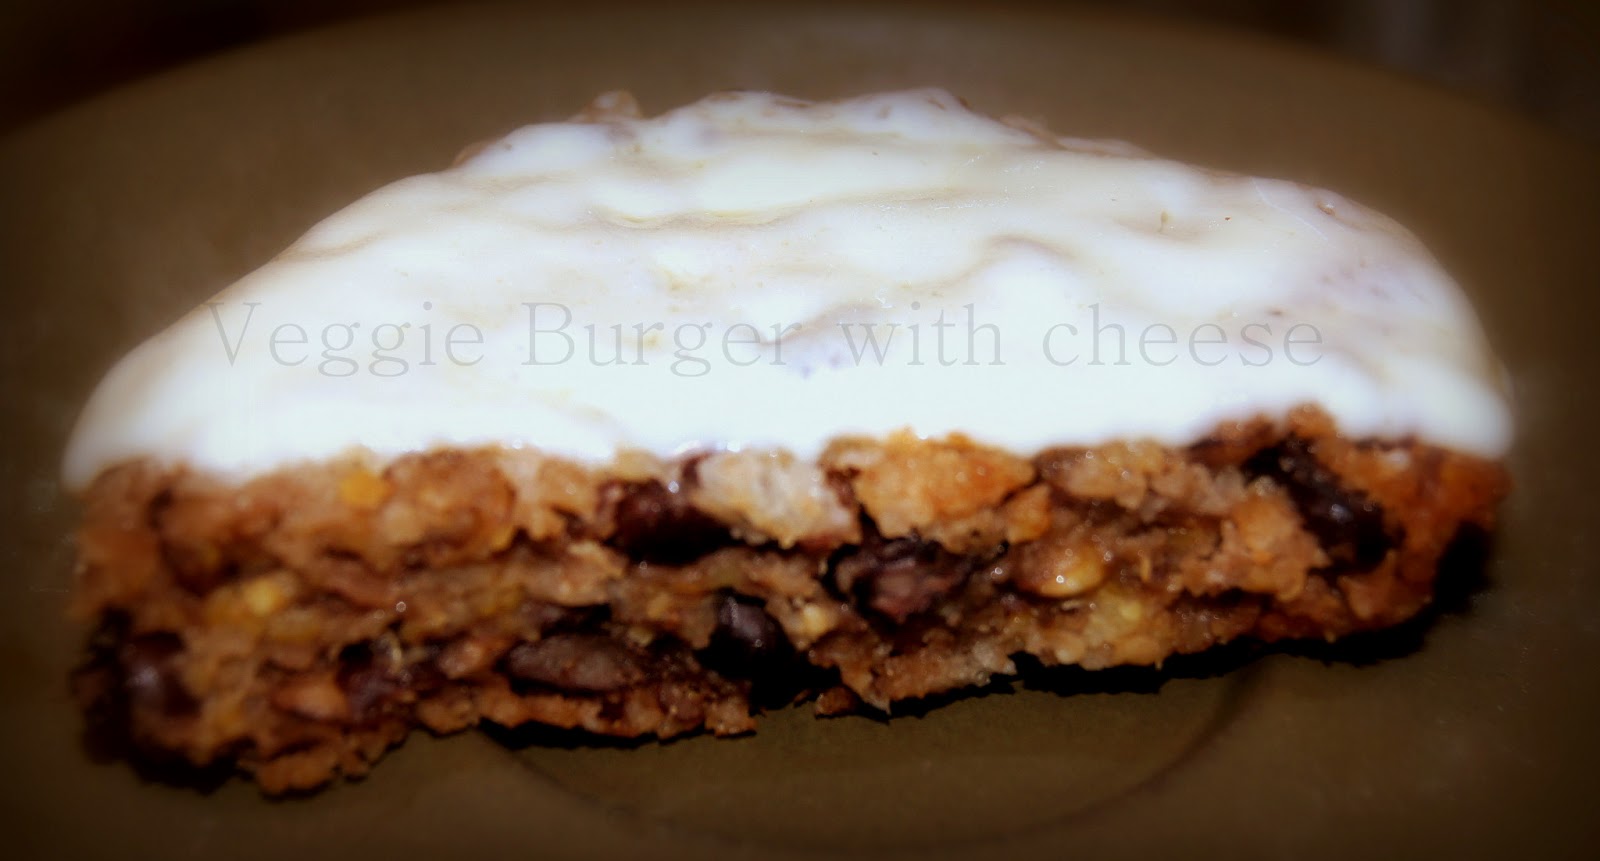
Veggie Burger Recipe


I love a good veggie burger but not all are created equally. I've had some really good ones and some really bad ones.  Then I learned how easy they are to make and now I can’t stop tweaking and experimenting with the recipe(s).

I base my burger on lentils. Sometimes I will use a  combination of lentils and garbanzo or black beans with my preferred binder, oatmeal.  I season the mixture like I would regular burgers and If I want to add some texture, I will sometimes coat them in a mixture of panko and a little flour. I do a quick pan fry in olive oil to brown the burgers and then finish cooking them in the oven at 375 degrees.

Well here is my latest recipe and I must admit I was pretty genius in the balance of ingredients (really protein packed):


1/3 c. Quinoa (measure dry – then cook per package instructions)
1/3.c. Lentils (measure dry – then cook per package instructions)
1cn   Black Beans
1c.    Oatmeal

  • Cook beans and quinoa  
  • Drain all liquid from beans and grains after they’ve cooked  (keep some liquid in reserve in case your mixture is a little dry)
  • Mix lentils, beans, quinoa and 1/2c. of the Oatmeal, continue adding until the consistency of the mixture is sort what you get  in making “meatloaf.” 
  • Add seasoning(s) to taste. I usually use: Worcestershire sauce, salt and pepper, fresh or minced garlic or little garlic powder
  • Pat into burger & coat with Panko/flour mix (optional)
  • Brown patties in skillet using Olive Oil or Canola (or completely pan fry if desired)
  • Place on a baking sheet and finish cooking in the oven for 20-30 minutes.  Actually everything, except the oatmeal has already cooked.
Burgers can be dressed and paired with most anything, use your imagination. I like using tortilla wraps. I hope you try them. They are super easy, cheap, tasty and healthy. Let me know how you like them and if you make any "personal" tweaks, I'd love to hear about it. 


Tuesday, March 19, 2013

DIY Flavored Water

DIY Flavored Water

I love this.  I often make my own flavored water just by dropping a few frozen berries or light refreshing vegetables like cucumber into a glass of ice water.  It is delicious and refreshing. Think I will be making a lot more in advance from now on.

Monday, March 18, 2013

easy home made ice cream


quick easy home made ice cream

Ingredients
1 ½ c.    soymilk
¾ c.      sugar
½ tsp.    salt
1 c.      heavy cream (or ½ & ½)
2 tsp     vanilla extract
1 ½ c     yoghurt
Optional:   1 banana & ¼ c. walnuts

Directions:
Scald milk (until edges bubble). Remove from heat. Mix in sugar and salt til dissolved. Stir/mix in cream, yoghurt and flavoring. Cover. Refrigerate 30 minutes.

Electric ice cream machine can be used as directed just pour complete mixture in and let it churn for 20-30 minutes.  Soft serve immediately or put in freezer for later.

Possible substutions can be made: regular milk for soymilk. Whipping cream instead of yoghurt, ½ & ½  for heavy cream, any fruit or nut and of any flavoring of your choice.

Sunday, August 26, 2012

Orange salad

My Orange Salad

orange-onion-salad
i tried this super easy orange salad. inspired by ( Rachel Ray's) 

Salad Bowl On Ice with Dome (Google Affiliate Ad) 


Hot and Sweet Orange Salad

my take using what was on hand in my kitchen...

DSCN2882ingredients:

1-2 medium size oranges
1 medium red onion
fresh mint
lime zest (optional)

i sliced the onion. i realized afterwards i should have sliced them julianne so i did dice them smaller after the picture was taken.
then peeled oranges and sliced like pinwheels not long segments
combined them in a large salad bowl
drizzled with a little olive oil and sprinkled with parmesan cheese
topped with mint and olives
(this recipe courtesy of Rachel Ray)

my variation  (added):
fresh mint (from my garden)
black olives
lime zest
and served with a few pepperoncini over mixed iceberg and butter lettuce
it was very good. different. be aware the onions can a bit overpowering especially after the salad sits (marinates awhile) you may want to use more sparingly they are very strong, a little goes a long way.
i want to make this again and use feta cheese

so for a quick easy dish on the fly this is a definite winner.  next time i'll get all the ingredients for Rachel's recipe and make with fewer deviations. however, i like that i can put my own spin on most of her dishes.  in fact she encourages and often gives suggestions to do just that.

what a fantastic way to enjoy oranges anytime really.


orange1


"Orange Peeler with Clamp" (Google Affiliate Ad)


Monday, August 20, 2012

pears nutrient rich


DSCN3569
from mom’s pear tree


Pears are nutrient-dense and an excellent source of fiber! One medium pear provides 6 grams of fiber, or about 24% of your daily needs, which can help you feel satisfied longer between meals and snacks! According to the DGA, the average American adult should consume approximately 2 cups of fruit daily (based on a reference 2000 calorie diet).

 One medium-sized pear supplies ½ of your daily fruit needs!
DSCN3551DSCN3556DSCN3566DSCN3568
A medium sized pear (about 166 grams) is a nutrient-dense food that contains only 100 calories, and is fat free. A nutrient-dense food is any food that provides vital nutrients (such as vitamins and minerals), but relatively few calories. Nutrient-dense foods are also usually higher in fiber and water, components that tend to make us feel full faster and for longer.
read more: pear facts + nutrition

i’ve got big plans for pears this year. pear jam. preserve. liqueur infused. simple syrup maybe even a pie or torte.

O' Pear

from my DeviantArt Gallery


Sunday, August 19, 2012

rice. pasta. grains


i’ve been crushing on some new grains.

black rice

i like to mix this rice with other grains. it has to cook for 45 minutes like most brown rice and can be a bit tough in texture is not cooked properly. 

basmati rice

DSCN3574

love this stuff. i can  and do eat it plain. it has such a pleasing subtle distinctive taste that some describe as nutty.
While basmati rice originated in India and Pakistan, it is grown in the United States as well and is becoming widely available. Basmati rice can come in both brown (unprocessed) and white (processed) forms. Unprocessed brown basmati rice retains more nutrients than the processed white form.
Each serving of basmati rice contains 35 g of carbohydrates. For white basmati rice, fiber content is typically less than 1 g. Fiber content of brown basmati rice is higher. Both types of rice contain little to no sugar.
Protein/Fat
Basmati rice is naturally low-fat, containing less than 1 g per serving. Each 3/4 of a cup serving contains 3 g of protein.
Vitamins
Basmati rice is a moderately good source of thiamine (13 percent of daily value) and niacin (8 percent of daily value). These B vitamins play a crucial role in energy metabolism.
Minerals
In addition to containing important B vitamins, each serving of basmati rice contains a small amount of iron (6 percent of daily value). Iron helps transport oxygen through the blood.
Read more: nutritional facts at  livestrong.com

quinoa

love the crunch of quinoa. i like it hot cold plain or loaded with herbs, meats and other seasonings.  it’s an added bonus that it a “super” food.  there are loads of recipes  on the web and since it’s so easy to cook and mixes well with anything you will come up with your very own in no time.


Friday, August 10, 2012

foodies

just what the heck is a foodie?
 
foodies are amateur hobbyists (wanna be chefs + critics) that love food + want to learn everything they can about the science + consumption + preparation, of both the best + the ordinary in the industry + superstar food personalities  

guess that makes me a foodie + it's partly their fault:

The ChewABC TV show with five fabulous host + cooks + guest + great format + variety + the chemistry +  each hosts’ personality is simply outstanding.  I want to hang out with them. This is my “new fav” show. 

The Splendid TableNPR, Sunday radio program hosted by Lynne Rossetto Kasper, acclaimed food writer + cooking teacher. She gives great tips + reviews + recipes. 

Rachel RayCBS TV show host + cook + lifestyle guru + adorably beautiful 


Cooking brings me joy + comfort + creativity
yep, am a foodie + proud of it + I got pictures to prove it

Saturday, July 28, 2012

Homemade Yoghurt

Now that it’s officially the hottest summer on record, I’ve declared it an ice cream summer; my chosen method of relief.  I love ice cream, I mean really, who doesn’t?  It’s like manna in the sweltering days of summer heat and relentless humidity.  When it becomes just too unbearable, I reach for relief:  my ice cream (actually, frozen yoghurt).
I’ve recently discovered the joy of making my own yoghurt.  It was a natural, organic leap to frozen yoghurt.  I’ve tried it a few times now and feel confident with the process enough to add personal tweaks. 

Four Simple steps:
  1. Heat Milk
  2. Stir in  Culture (plain yoghurt with live cultures)
  3. Let it sit overnight (8 hours)
  4. Strain//refrigerate
 DSCN9983
Yoghurt Recipe

Overview:

Making yogurt is about allowing bacteria to ferment in milk. You need a live yogurt culture to start the process, any plain whole-milk yogurt from your local grocery store will work.
Just make sure the yogurt does not contain starch or modified starch.
The final product may be rather thin yogurt, initially. You can add powdered milk, gelatin, or xanthan gum to thicken. Add one (1) tablespoon of powered milk (or gelatin) per 1 cup of milk, as a general rule for a thicker, creamier yogurt.
The yogurt needs to sit at room temperature overnight (7-8 hours). The finished yogurt can be refrigerated for up to five days.

The yogurt needs to sit at room temperature overnight (7-8 hours). The finished yogurt can be refrigerated for up to five days. Makes about 2 cups ( you can double or half the recipe) 


Ingredients:
2 cups milk
2 tablespoon plain whole-milk yogurt


Directions:

  • Heat the milk to 110 degrees (lukewarm) in a saucepan or crockpot (low setting for about 1-2 hours). 
  • Pour it into a large bowl, then stir in the yogurt.
If you choose to use a thickener, you may add it now or wait until just before it’s ready to refrigerate (after 7-8 hrs of fermentation). I’ve done it both ways and it doesn’t seem to matter. 


  • Cover mixture with a clean kitchen towel. Let it sit at room temperature overnight. I usually put my mine in the oven (which is off) because it’s out of the way and I feel the temperature is more even and constant.
After the yogurt has sat overnight, it is ready. But if you want it to be even better, refrigerate it for at least 2-3 hours and it will become thicker and creamier. The yogurt can be refrigerated for five days  


/*dlb-pinterest hover-pin-it button-start */ /*dlb-pinterest hover-pin-it button-end */